
During the last six years, I’ve re-tiled 3 bathrooms and one entire kitchen backsplash in my house. Each time, the grouting itself was successful; it was the clean-up that was a close call. Grout haze can be very persistent. I thought it would clean up well. It doesn’t. The first bathroom job was when I over-scrubbed a fresh grout line with a rough sponge and tore out a 10″ section of grout, which I had to redo the following day.
The first project took me an additional half day of work due to an error in clean-up. I had seen some YouTube videosan d I thought I could do it without any real strategy, so that’s what I did, and it cost me. Even after I repaired the joints, the grout was patchy in two places, as I had already affected the surface finish when I was trying to get rid of the haze that I let around the joints. For the following year, I could never get into this bathroom without those two patches.
By the time I got to the master bathroom project, I knew how the process would go. It only took me less than 45 minutes to complete a job that would have taken me 4 hours on my first try! With proper technique, that’s the difference. This is what I do now every time… after trying a few times, after breaking a few sponges, and much experimentation.
Why is it more difficult to clean after grouting than it seems?
The majority of do-it-yourselfers believe grouting is the difficult task. It’s not. The hard part is the 30–60 minute period after the grout has been spread when you have to wipe down before the grout sets in as a film known as grout haze.
Grout haze is a fine milky film that adheres to the tile as it dries. On glazed ceramic or porcelain tiles, it looks like a dusty film. It can enter the surface of unglazed or natural stone tiles and then is difficult to spot until lit up, when it’s not seen at all.
The difficulty is that grout haze is not always apparent at the time. I’ve cleaned a set of tiles and thought that it was nice, and then the next morning, I come back and see a white film everywhere when the light is different. That’s the fog that was developing overnight as the surface dried out. You feel you have finished; you don’t!
The chemistry is simple: grout consists of cement, sand, pigments and water. This evaporation concentrates the minerals and cements on the surface. Those particles adhere to the tile lightly. This bond is weak when the grout is fresh and can be easily removed by a damp cloth. The relationship improves as time goes on. 24 hours later, you are up against a surface that has essentially “micro-cemented” itself to your tile.
Let’s learn from other people’s mistakes: Mistakes I Made (And You Should Avoid)
I’m putting these up first since they took me some time and money. If you recognize yourself in any of these, STOP RIGHT NOW.
Mistake #1
I over-wet the grout and scrubbed too hard.
In my first bathroom, I got a rough green scrubbing pad within 20 minutes of grouting my bathroom floor. The grout was not set. I got it out of 3 joints without any problems. Lesson: Use only a soft damp sponge (not an abrasive pad) and squeeze it almost dry before applying to the tile.
Mistake #2
For my marble tiles, I used vinegar.
Vinegar is acidic (pH~2.5). Calcium is the basis of marble, travertine, and limestone, which get etched permanently by the acid. After cleaning my bathroom counter tiles, I discovered dull spots. The places where those were are still there. Use only a stone cleaner that is a pH neutral stone type cleaner if you have natural stone.
Mistake #3
I let the time go by too long without wiping the first time.
However, I got caught up at my kitchen backsplash, and let the grout sit 4 hours before wiping. The haze had now hardened at this time. The other thing I had to do was take another 3 hours and a bottle of commercial haze remover to fix what a 20-minute wipe would have done at the right time.
Mistake #4
Went over the water level when cleaning up
Grout is weakened when excess water is present as it sets. The grout in the joints remained soft and crumbled off the edges when I rubbed them down after I flooded the surface. Take a damp sponge and squeeze it out so that it’s only slightly moist.
Mistake #5
I didn’t seal the grout afterwards.
After two months of my bathroom floor project, the grout lines started to discolour due to moisture and soap. I still hadn’tsealedd them. Now
What You Need Before You Start
You will need the following:
These are the exact supplies that I have on hand for EACH TILE JOB. No fancy stuff — all of this is in any hardware store.
I use microfiber cloths (x4) for the first and last wipe down. I like them better than the standard sponges, as they do not drag grout over the tile surface; they lift the grout up clean.
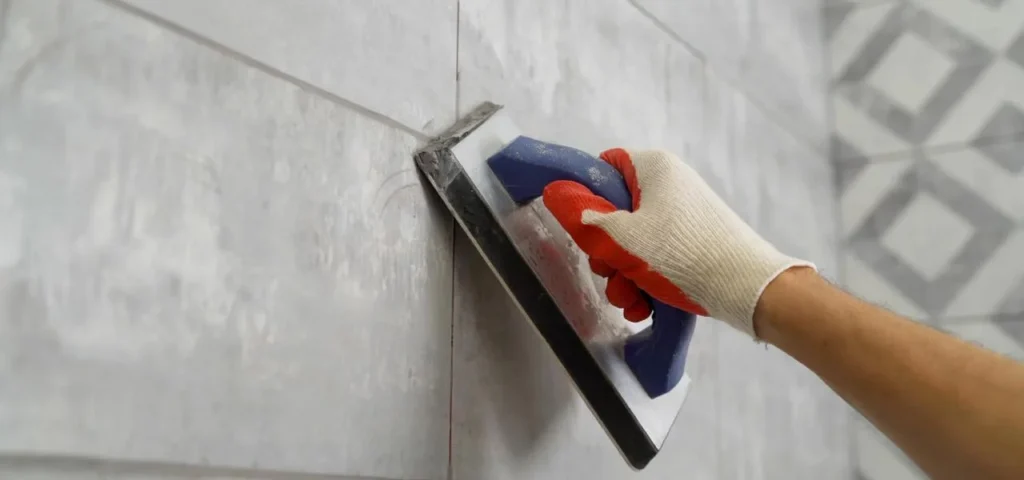
The main grout haze removal is managed by a large tile sponge during the all-important 20-30 minute period. The most crucial tip is to get it as dry as possible before you touch the tile by wringing it out. A wet sponge is worse than no sponge.
Two buckets of clean warm water, not one, two. For the first rinse, I use one, and for the final clean rinse, I use another. Change the water every 10–15 minutes. Rinse water will only spread dirt besides the grout.
Ceramic and porcelain tiles (light haze): Use distilled white vinegar mixed 1:1 with water. Always have a Spray Bottle on hand. There’s one hard and fast rule: Do not use it on natural stone. The acid will permanently attack marble and travertine.
When I need to remove a grout haze that has been on for 4+ hours, I use a commercial grout haze remover. I have found Custom Building Products SurfaceEx to be a good choice; it’s designed for this specific application and won’t harm the surface of the tile if used properly.
When using marble, travertine, or limestone, you can’t do without a pH-neutral cleaner. The calcium tiles do not do well with anything that is acidic or highly alkaline. I use Miracle Sealants Stone & Tile Cleaner; it works as well and won’t damage the surface.
The last thing most do-it-yourselfers do not do is install grout sealer, but that is what I did and paid for in less than 2 months with stained grout lines. Use it 72 hours after grouting, after the joints have completely cured. 15 minutes, lasting up to 1-3 years.
Rubber gloves may appear to be unnecessary, but exposure of skin to grout will cause skin to dry out and crack with extended contact. I always wear them as soon as I open the grout bag until I rinse them.
This is the most important of the Three Timing Windows.
The most important lesson I learned is that cleaning after grouting is a process. There are three different windows, and each needs to be tackled differently. The only thing that is important is to get the first one correct, which causes the second one to be problematic.
Window 1 – 20-30 minute Wipe (While Grout Is Still Workable)
This is the most crucial window, and most fail to pay attention. The surface begins to haze after about 20-30 minutes of spreading the grout once it has been spread, due to the moisture evaporating. Grout in the joints is still soft, but not wet. This is the time for your first clean up.
A large tile sponge, wrung dry, is used. I clean diagonally and not across the grout lines to prevent grout from being dragged from the joints. Change the bucket water often and rinse the sponge every two passes. This initial sweep will eliminate 80% of your clean-up task.
The hard way lesson: don’t rush through this pass simply to finish it. Install in sections of approximately 4-6 sq.ft. each. Wipe, rinse, wring the sponge, and proceed to the next section. If you’re moving too quickly, you’re not getting the grout off;you’re just spreading particles of grout around. It’s the painstakingly slow and careful approach that’s effective here.
Pro Tip
Wipe diagonally (at a 45° angle) to the tile joints. When grout is applied directly across the joints, it is removed. If you skim over the items rather than drag into them, you are going “diagonal” through the items.
Window 2: The 2–4 Hour Polish
This fine white film on the tile surface will be visible after a good first cleaning 2-3 hours after the wipe application. This is normal. This is when the grout in the joints is set sufficiently to not be affected by light wiping.
This last haze is buffed off with a dry microfiber cloth, which I use in a circular motion. Forlarge areas, I’ll apply a slightly moistened cloth first, then one that’s dry. This is typically all ceramic or porcelain tiles will require; no chemicals.
At this point, the “raking light” technique is necessary. Use a torch or phone flashlight at a very low angle (close to the surface of the tile) and gently move it across the tile surface. The remaining haze will be evident as a white shimmer right away. Under raking light, areas that appear clean from overhead lights will often show haze which is not obvious from overhead light. I always do this before I say I am finished!
The Hardened Haze Problem will be covered at Window 3 (4-24 hours).
If the first two windows are not used, such as being called away or the project being extended, the haze will harden. Now the chemical solution is needed. Here’s what I use:
For Ceramic / Porcelain
Dilute the vinegar with water. Use a diluted vinegar solution.
Mix 1:1 White Vinegar to warm water. Use a sponge to apply and leave on for 5 minutes, then use a non-scratch nylon brush to scrub lightly. Rinse thoroughly. Effective in treating haze up to 12 hours old. NEVER use on natural stone!
This is for Heavy Haze (Any Ceramic/Porcelain).
Commercial Haze Remover
There are products formulated specifically for grout haze, such as Custom Building Products SurfaceEx or Aqua Mix Concentrated Sealer & Coating Remover. Be sure to adhere to the manufacturer’s instructions exactly, which usually include a dwell time of 5–10 minutes followed by scrubbing and rinsing. Always try in a secret corner first.
For Natural Stone (Marble / Travertine)
Only use pH-Neutral Stone Cleaner.
Use a stone-safe cleaner such as Miracle Sealants Stone & Tile Cleaner. Do not use a scrub brush; rather use a soft cloth. Rinse in clean water. When natural stone develops a layer of haze, only a professional can remove it without causing damage; acid-based removers will only damage the surface.
Distinctive My Step-by-Step Process
Here’s what I really do on all of my projects, in order. I have worked on this for six years, and it is always effective.
Complete grouting and allow 20-25 minutes to pass.
Set a timer right after completing the last section. Do not wait until it has “gone dry. Grout sets quickly in warm or dry conditions — sometimes much too quickly.
Apply damp sponge, diagonally, first pass.
Fill 2 buckets with clean warm water. Squeeze out the water from the sponge so that it is just slightly moist. Wipe in 45° diagonal directions. Wash sponge after every 2 passes. Replace the water in the buckets every 10-15 minutes.
Cover all tiled area.
Allow to dry for 1-2 hours and then check
Walk away. When the surface appears dry, look under raking light (flashlight held at a low angle across the surface of the tile). Any haze left behind will show up as a white shimmer.
The second pass involves drying the microfiber buff.
A dry microfiber cloth in circular motions will take off nearly all of the remaining haze from standard ceramic or porcelain. If you still do not succeed, then go to Step 5.
Use vinegar solution or haze remover, if necessary. ry
If the haze is only on ceramic/porcelain, apply diluted vinegar or commercial remover and allow to sit for 5 minutes, gently scrub with a nylon brush, and rinse well with clean water. Dry with microfiber.
The end inspection iscarried out under raking light.
Use a torch or phone torch at a low angle, sweeping all over the surface. If the haze still appears in isolated locations, then follow Step 5 on these particular areas only.
After 72 hours, apply grout sealer.
Once the grout is completely cured (manufacturer’s instructions will vary, but most recommend 24-72 hours), use a penetrating grout sealer using a small brush or grout sealer applicator. This step will give you years of stain protection on your completed tile.
Critical Warning
Avoid foot traffic on the floor tile surface for at least 24 hours after grouting – even if surfaces appear dry. Grout dries from the outside in; the surface will dry and harden first, and the joints will remain soft. Walking on it early results in hairline cracks which allow moisture to enter.
What’s Different By Tile Type
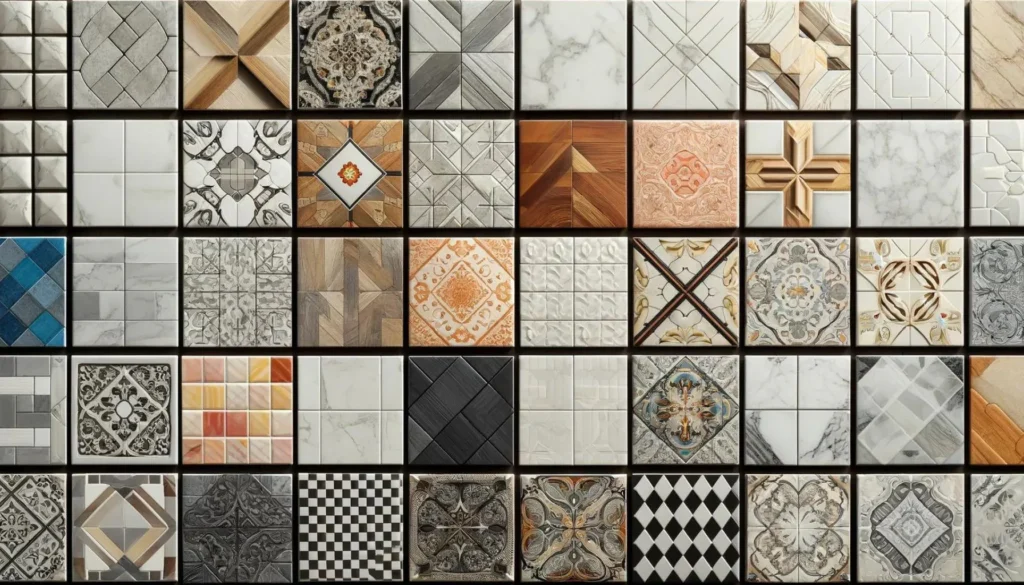
Not every tile will be identical during the cleaning-up procedure. From working with various surfaces, I have learnt the following:
Glazed Ceramic & Porcelain
Cleanest to clean. Grout haze will not penetrate the glazed surface since it is non-porous. The regular “damp sponge and vinegar” trick is sufficient. The products here are the most flexible, and even if you let the haze stay a bit longer than you would like, a commercial remover will clear the surface without any problems.
Unglazed Porcelain (Including Large Format Tiles)
Less glazed haze may bond somewhat more aggressively. I will always do my first wipe earlier on unglazed tiles – nearer 20 mins than 30. Most importantly, I seal the face of each tile before I grout it, to provide a protective barrier. Cleanup is now a breeze – the haze has no place to adhere and is easily wiped. Do not skip this pre-seal step with large format unglazed porcelain (600mm x 600mm or larger). The larger the surface area, the more surface will be exposed and the more haze per tile.
Natural Stone (Marble, Travertine, Slate)
Handle these very carefully. Avoid using vinegar, lemon juice, or any acid-based cleaners. Do not use commercial heavy-duty haze removers without verifying that they are “stone safe.” PLEASE NOTE: I seal all natural stone tiles before grouting; it is not an option in my process. Only a pH-neutral stone cleaner and soft cloth is used for post-grout cleanup. However, if the haze is significant, I call a professional; even the best professional stone cleaning will not harm the surface of the natural stone.
One thing I learned is about my marble bathroom ccounte:, I never want to do that again. I applied a diluted vinegar solution, but only once, in my own mind believing that it would make no difference with such a small amount. In less than one week, I was able to see three “blank” circular marks on the polished surface where the acid had attacked the surface. I can’t fix it by re-polishing at home. A stone care professional suggested giving it a $180 stone re-hone and re-polish for those spots. I paid it. I now consider natural stone to be as fragile as glass.
Mosaic & Glass Tiles
Grout haze is more obvious on glass tiles than on any other tile due to their reflective surface. Use a smaller area (2-3 square feet at a time) and clean the first area within 15 minutes of grouting it. When using on glass, a chamois cloth leaves no lint and buffs the surface as it cleans, whereas a sponge tends to leave lint. A dry chamois in tight circular movements finishes glass tiles to a cleaner, streak-free surface; sometimes it can’t be attained with the microfiber cloth.
How I Sealant Maintenance Grout
Sealing the grout is the last step of the installation process, but not the last step to maintaining the grout. Most homeowners seal once and forget, and then are surprised that their grout is dark and stained 3 years later. To keep grout clean in the long run, I do this.
Re-seal periodically (1-2 years) in damp environments. The bathroom floor and shower space are continually exposed to moisture and cleaning products. I put a reminder on my phoner every 18 months. The test I use is to drop a few drops of water on the grout line. Water will pool if the sealer is still working. If it absorbs and darkens the grout, it’s time to re-seal. It involves only a 220-minutejob, a $12 bottle of sealer — not nearly as much as mold and discoloration.
Clean spills immediately. Even sealed grout cannot be considered stain-proof. Although red wine, coffee, and cooking oil are not as likely to stain, they can still do so if left to sit for hours. Catch up with cleaning spills within 15-20 minutes. I use a weekly pH-neutral tile cleaner that is diluted in warm water on the floor in the kitchen. No aggression but maintenance.
Do not use bleach cleaners on colored grout. Over time, bleach will cause pigmented grout to fade. This was the part I regret in my guest bathroom: the grey grout, which was slowly turning to almost white where I regularly spritzed my bathroom with bleach. Use pH-neutral cleaning products. For mold, use a grout-specific cleaner that is rated safe for your grout colour.
I use baking soda paste plus a bit of hydrogen peroxide on a good old-fashioned toothbrush for mold in the joints of grout. Allow to sit for 10 minutes, gently scrub, rinse. This is much less harsh than bleach, and will not compromise the sealer. Effectively prevents early mold growth in shower grout without damage.
Frequently Asked Questions
What is the minimum time before the cleaning of grout from tiles?
Begin your first light wipe 20–30 minutes after the grout has been finished and the haze is still soft. The final deep clean should be done after the grout has cured as specified by the manufacturer (usually 24-72 hours) to allow the grout to fully cure. If it takes more than 4 hours, the haze will set in and become much harder to wipe.
Is it possible to use vinegar to remove grout haze?
Yes, but when installed on ceramic or porcelain tiles. Diluted white vinegar (1:1 with water) will work on fresh or lightly hardened grout haze. Avoid using vinegar on natural stone tiles (marble, travertine, limestone, slate) because it will permanently etch the surface of the tile.
What is grout haze and why does it occur?
Grout haze is a thin layer of grout mineral remaining on the surface of the tile after the grout dries and the water in the grout evaporates. Exhibits as a grey, milky, or whitish layer. It is not uncommon and is considered part of the grouting process – it is only removed before it sets, which usually takes place within the first few hours after grouting.
How to get rid of tile grout haze?
On ceramic or porcelain: apply a commercially available grout haze remover such as SurfaceEx by Custom Building Products. Apply, dwell 5-10 minutes, scrub with a nylon brush, and rinse copiously. In the case of natural stone: only use a pH-neutral stone-safe haze remover or follow the advice of a professional tile contractor.
Is it necessary to seal grout after cleaning?
Yes, for most types of grout. Over time, unsealed grout becomes porous and takes on stains, moisture, and mold. Use a penetrating grout sealer 72 hours after grouting (after the grout is cured). Reapply every 1-3 years based on usage and traffic volumes.
May I walk on the new tile during grout haze cleaning?
Not on floor tiles for the first 24 hours. Even on the most seemingly set surface, the grout is still drying, and foot traffic can cause joint cracking. This is not a problem for wall tiles, but don’t touch newly grouted joints for at least 12 hours.
My Final Thought
Tile work is one of those jobs in which the quality is in the final 10%. The spreading of grout is simple. People who have tried to do it themselves often mess up where they’re getting new carpet on a project that’s progressing well, and that’s where the cleanup is concerned.
I’ve seen friends do great tile work on a weekend and have a beautiful installation that turns out dull, hazy,or patchy only after the work is finished, not because of the tile work, but because of the cleanup. A $15 bottle of grout haze remover just won’t cut the mustard if it is applied too late. The key to getting into the right habits before you begin is.
The one thing I do now (or at least I should) is to set a time atthe start of grouting operations. The 20-minute window is not an option. The difference between a 30-minute clean up and a 3-hour clean up.
In case you’re ever in doubt about what kind of tile you’re adorning, or you’ve left a haze on the tile for too long, don’t take a chance at using a chemical; just ask a tile professional for guidance before you risk ruining an unrepairable surface. There is no excuse for replacing a travertine countertop because of an incorrect bottle call when the cost of the phone consultation is relatively inexpensive.